
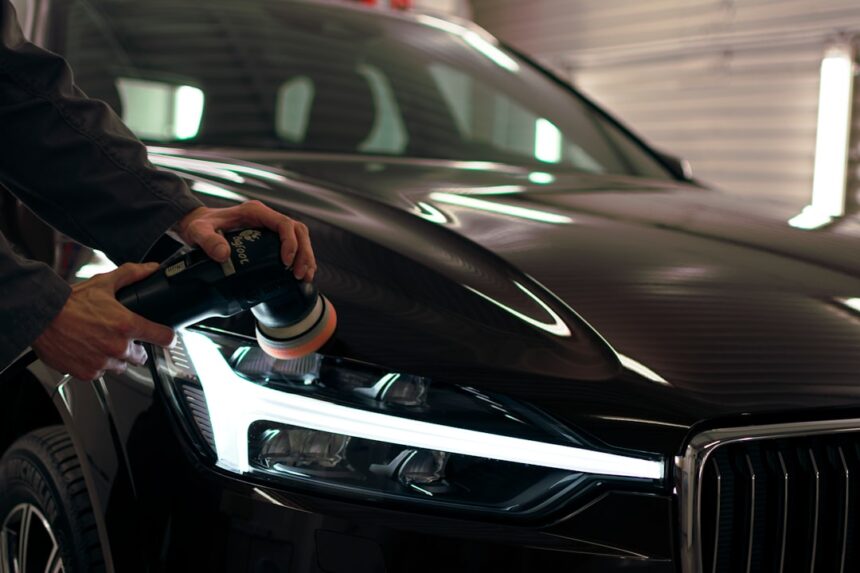
Cordless polishers have transformed mobile detailing and auto body work — no more running extension cords, no more tripping hazards, and dramatically improved maneuverability around vehicles. Battery technology has caught up to corded polishers for all but the longest correction jobs. This guide covers 5 cordless polishers that consistently deliver professional results, from $99 hobbyist DA polishers to $650 pro-grade dual-battery systems.
Our top picks for 2026
Milwaukee M18 Fuel 5-Inch Dual Action Polisher
Professional-grade cordless polisher with brushless motor. Powerful enough for full paint correction on entire vehicles. Uses M18 battery platform (compatible with Milwaukee’s other cordless tools). Variable speed 1,800-3,600 OPM. Perfect for pros who already own M18 tools.
Check Price on Amazon →Ryobi 18V ONE+ Dual Action Polisher
Budget-friendly polisher for hobbyists. Uses Ryobi’s ONE+ battery platform. Variable speed 1,500-3,000 OPM. With batteries: $199. Fine for occasional detailing work — reduced battery life vs. professional units, less powerful motor.
Check Price on Amazon →Rupes Bigfoot Cordless LHR15 Mark III
The Italian-made polisher preferred by professional detailers. Long-throw random orbital action (15mm) reduces heat and haze. Battery version delivers 60-90 minutes of continuous polishing. Overkill for hobbyists, essential for professional detailers who value smoothness and reduced correction time.
Check Price on Amazon →Milwaukee M12 Fuel 3-Inch Polisher
Compact polisher for spot correction, headlights, wheels, and tight areas. M12 battery platform. Not for full vehicle correction — too small for efficient large-area work. But essential companion to a full-size polisher.
Check Price on Amazon →DeWalt 20V Max Cordless Rotary Polisher
Rotary (not dual-action) polisher for aggressive correction work. Higher risk of hologramming and burning if used incorrectly. Only recommended for experienced users. Powerful correction capability for deep scratches.
Check Price on Amazon →How to choose the right polisher
Random orbital (DA) vs. rotary
- Random orbital / Dual Action (DA): Safer for beginners. Random pattern reduces risk of burning through clear coat or creating swirl marks. Slower correction rate but forgiving.
- Rotary: Faster correction rate but requires experience. Aggressive rotation creates heat that can damage paint. Preferred by pros for heavy correction.
- Long-throw random orbital (Rupes): Best of both — safer than rotary but faster than short-throw DA.
Backing plate size
- 3-inch backing plate: Great for spot correction, headlights, tight areas.
- 5-inch backing plate: Standard for auto body work. Balances coverage and maneuverability.
- 6-inch backing plate: For larger vehicles. Faster coverage on flat panels but harder in tight areas.
Battery platform considerations
- If you already own Milwaukee, DeWalt, Ryobi, etc. tools — stick with your platform to share batteries.
- Cordless polisher batteries are large (5-9Ah) — one battery typically completes 30-60 minutes of polishing.
- Buy at least 2 batteries — one charging while you use the other.
Paint correction — the process explained
The paint layers
Modern automotive paint has 4 layers:
- Primer: Bonds paint to metal. Rarely a concern.
- Base color coat: The color you see. Thin.
- Clear coat: Protective transparent layer. Where 90% of damage occurs.
- Wax/sealant/ceramic: Optional additional protection.
What paint correction fixes
- Swirl marks and micro-scratches (from bad washing techniques)
- Water spots (etched into clear coat)
- Bird dropping and bug etching
- Fine scratches (fingernail-catches-on-it depth)
- Paint oxidation (dull, chalky appearance)
- Holograms from previous bad correction
What paint correction can’t fix
- Deep scratches through the clear coat into base color
- Rock chips
- Damage down to primer
- Damage requiring repaint
The correction levels
- Single-stage correction: One-step polish removes 50-80% of imperfections. Fast, appropriate for maintenance.
- Two-stage correction: Cutting compound + polishing compound. Removes 85-95% of imperfections. Standard for enthusiast detailing.
- Three-stage correction: Heavy cut + medium polish + fine polish. Removes 95%+ of imperfections. Full pro-level correction.
Step-by-step polishing walkthrough
Preparation
- Wash the vehicle thoroughly with pH-neutral car soap. Two-bucket method with grit-guards.
- Iron decontamination. Spray iron remover (turns purple as it reacts with brake dust particles). Rinse.
- Clay bar entire painted surface to remove embedded contaminants. Watch how much clay picks up — often surprising.
- Panel wipe with alcohol-based prep spray to remove oils and prepare for polishing.
- Tape edges and trim you don’t want to accidentally polish (rubber trim, plastic, chrome).
Test spot procedure
- Choose a small test area. 12×12 inch section on a low-visibility panel like the trunk.
- Try your least aggressive combination first. Fine polishing pad + light polish.
- Work the polish for 4-6 passes with the polisher.
- Wipe clean and inspect in bright light.
- If it corrected: use this combination for the whole vehicle.
- If not: step up to more aggressive pad or compound. Repeat test.
The polishing sequence
- Apply 3-4 pea-size dots of polish onto the pad.
- Prime the pad by pressing it against a panel and smearing polish before turning on polisher.
- Start on low speed to spread polish, then increase to working speed (3-4 on most polishers).
- Overlap passes by 50%. Work in a 2×2 foot section.
- Slow, steady movement. About 1 inch per second.
- Work polish until it’s clear or nearly so. Then wipe with clean microfiber.
- Inspect in bright light. Sunlight or LED spotlight.
- Move to next section and repeat.
Post-correction protection
- Wipe entire vehicle with panel prep spray to remove polish residue.
- Apply sealant, wax, or ceramic spray for protection.
- Buff off residue.
- Enjoy corrected paint for 3-6 months (with regular washing) or up to 5 years (with ceramic coating).
Common polishing mistakes to avoid
- Skipping the test spot. What works on one panel may burn through another. Always test first.
- Too much pressure. Let the polisher do the work. Excessive pressure creates heat that damages paint.
- Moving too fast. Passes should be slow, about 1 inch per second. Fast movement doesn’t correct.
- Working polish too long. Once polish is clear, it’s done working — additional passes just heat the paint.
- Wrong pad + polish combination. Heavy cutting pad + fine polish = wasted effort. Match aggression levels.
- Working in direct sun. Polish dries too fast to work properly. Move to shade or work early/late.
- Polishing without decontamination. Embedded particles create scratches during polishing.
- Not cleaning the pad. Compressed pad = reduced correction + increased heat. Clean during use.
FAQ
Is a cordless polisher powerful enough for real paint correction?
Yes for M18/M12 Milwaukee and Rupes Bigfoot systems. Battery-powered polishers now match corded models for most work. Extended full-vehicle correction may require battery swaps.
What’s the difference between random orbital and rotary polishers?
Random orbital moves in random pattern — safer for beginners, slower correction. Rotary rotates in a single direction — faster correction but higher damage risk. Beginners should always start with random orbital.
Do I need multiple pads?
Yes. At minimum: heavy cutting pad, medium polishing pad, fine finishing pad. And multiple of each — a used pad has different cut than a fresh one.
How long does polishing a car take?
Full paint correction: 6-12 hours for one-stage; 12-20 hours for two-stage. Single-panel spot correction: 20-45 minutes.
Can I damage my paint with a polisher?
Yes. Rotary polishers can burn through clear coat if held in one spot too long. Random orbital polishers are more forgiving but can still damage paint with wrong pad/polish combination.
Do I need to wax after polishing?
Yes. Polishing removes protective coatings. Apply sealant, wax, or ceramic coating within a few hours of polishing to protect the freshly-corrected paint.
How often can I polish my car?
Clear coat is finite. Each correction removes 3-8 microns of clear coat. Most factory clear coats are 40-60 microns total. So budget for 4-8 full corrections over the vehicle’s life.
What’s the best polish for beginners?
Meguiar’s Ultimate Compound + Ultimate Polish combination. Forgiving, widely available, delivers good results. Progress to more specialized products as skills develop.
Should I get a corded or cordless polisher?
Cordless for convenience, corded for extended work. If you polish only your own vehicles, cordless is fine. If you polish 3+ vehicles per week, corded is more practical.
Do professional detailers use cordless?
Increasingly yes. Battery technology has improved dramatically, and cordless models are now used in high-end professional detailing. Corded still holds a place for extended production work.
Bottom line
Match your equipment investment to how you’ll actually use it. Overbuying wastes money; underbuying wastes time. All our top picks are proven, well-supported, and represent good value at their price tier.