
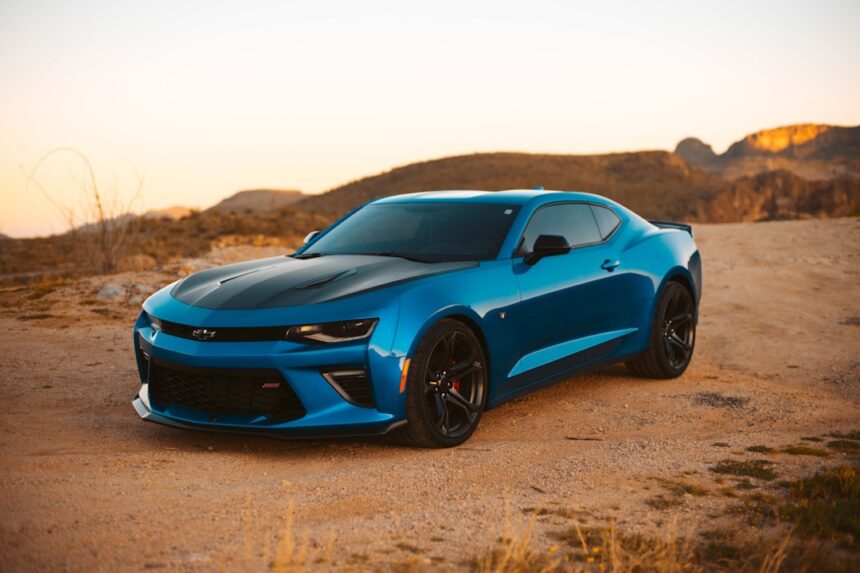
A body shop will quote you $850 for the lightest Chevrolet Camaro damage and $9,000 for major collision. This guide covers real 2026 prices by damage type for 2016-2024 (6th gen — production ending) Chevrolet Camaro models.
What’s specific to the Chevrolet Camaro
Body construction: 6th gen Camaro uses steel throughout with aluminum hood on SS and ZL1 trims. ZL1 1LE track pack adds carbon fiber components (splitter, spoiler, side skirts). Post-2024 no new Camaro production announced.
ADAS sensors + calibration: Chevy Safety Assist standard. Track-focused models (ZL1) have unique aero components requiring specific calibration. Post-2020 Camaros may need OnStar system updates after any damage.
Model-specific damage patterns: SS + ZL1 trims have aggressive bumpers + aero package that add repair cost — $850-$2,850 for trim-specific parts. ZL1 1LE carbon fiber components are $2,000-$8,000 each. Track owners often have exhaust + suspension modifications that complicate repairs. Rare 2024 Camaro production means parts may be discontinued sooner than typical vehicles.
Insurance and shop network: Camaro insurance rates run 30-50% higher than average due to sports car classification + high-performance trim availability. Ford + Chevy dealer + collision network is extensive. Repair times average 12-16 days.
Chevrolet Camaro body repair costs by damage type (2026)
| Damage type | Shop cost | DIY alternative |
|---|---|---|
| Front bumper repair | $850–$1,650 | $150–$275 |
| Front bumper replacement (ZL1) | $1,850–$3,250 | n/a |
| SS/ZL1 aero component | $850–$2,850 | n/a |
| Aluminum hood replacement | $1,650–$3,150 | n/a (aluminum-certified shop) |
| ZL1 1LE carbon fiber panel | $2,000–$8,000 | n/a |
| Fender replacement | $1,250–$2,150 | $400–$650 |
| Track damage (multiple panels) | $4,500–$12,000 | n/a |
| Full front-end collision | $4,500–$9,000 | n/a |
Best DIY products for Chevrolet Camaro body work
Dupli-Color Perfect Match Chevrolet Paint
Chevy-specific aerosol. Common Camaro codes: GBA Ebony Black, GCA Rally Green, GAK Bright Yellow.
Check Price on Amazon →LUNQIN Chevy Camaro Handle Covers
Vehicle-specific gloss-black covers. Prevents fingernail scratches on daily-driver Camaros.
Check Price on Amazon →3M Scotchgard Paint Protection Film
Essential for Camaro front-end. Track use + spirited driving damages front-end paint quickly.
Check Price on Amazon →Adam’s Graphene Ceramic Spray
Preserves Camaro paint. Especially critical for enthusiast owners preserving resale value.
Check Price on Amazon →Chemical Guys VSS Scratch Remover
Pro-grade compound for deeper scratches. Use with dual-action polisher.
Check Price on Amazon →BlueDriver Bluetooth OBD2 Scanner
Reads Chevy-specific codes. Essential for track-day vehicle health monitoring.
Check Price on Amazon →When to DIY vs. when to use a shop
- DIY-friendly: Scratches, small dents, chip touch-ups, minor cosmetic damage.
- Shop-only: Any damage requiring ADAS calibration, aluminum panel work, panel replacement, structural frame damage.
FAQ
How long does Chevrolet Camaro body repair take?
Bumper: 3-5 days. Panel: 5-9 days. Major collision: 10-21 days.
Where is the Chevrolet Camaro paint code?
Inside the driver-side door jamb sticker. 3-digit code labeled “Paint” or “Color”.
Does Chevrolet have certified collision shops?
Yes. Chevrolet maintains a certified collision program with factory-trained shops.
Bottom line
Get comparison quotes via our free quote form, or browse verified shops in our national directory.
Step-by-step: what to do the moment you damage your Chevy Camaro
The first 48 hours after body damage determine whether your repair goes smoothly or turns into a months-long insurance battle. Here’s the exact process our field-team recommends:
Hour 0 — at the scene
- Move to safety. If the Chevy Camaro is drivable and blocking traffic, pull to the shoulder. If not, turn on hazard lights and stay in the vehicle if traffic is heavy.
- Document everything with photos. Take 15-25 photos from every angle — wide shots showing vehicle position, close-ups of every damaged panel, photos of the other vehicle (license plate, VIN if visible), road conditions, traffic signs, skid marks. Photos are your single most important piece of evidence.
- Exchange information. Driver’s license, insurance card (photograph both sides), vehicle registration, phone number, plate number, and vehicle year/make/model of the other party.
- Call the police for anything beyond a scratch. Even at low-speed collisions, a police report protects you from later disputes. In many states it’s legally required if damage exceeds $500 or $1,000.
- Do NOT admit fault. “I’m sorry” can be used against you. Stick to facts: what you saw, when, where.
- Note witnesses. Get names and phone numbers of anyone who saw what happened.
Hours 1-24 — insurance + shop selection
- File your claim within 24 hours. Most policies require prompt notification. Late reporting is a common reason claims get denied.
- Get a claim number in writing. Every conversation with your insurer references this number.
- Know your rights on shop selection. Your insurer will steer you to a Direct Repair Program (DRP) shop. In every U.S. state, you have the legal right to choose your own shop. DRP shops are convenient but often use aftermarket parts and cut corners on labor.
- Get 3 independent estimates. Not just DRP shops. Include at least one independent shop with strong Google reviews and one high-volume production shop for comparison.
- Ask each shop three questions: (1) OEM or aftermarket parts? (2) How do you handle ADAS calibration? (3) What’s your labor rate and estimated hours?
Days 2-7 — repair authorization
- Review the estimate line-by-line. Common gotchas: missing R&I (remove and install) labor, no allowance for ADAS calibration, aftermarket parts substituted without your consent, no allowance for pre-scan/post-scan diagnostics.
- Push for OEM parts on safety-critical components. Bumper reinforcements, airbag sensors, crash bars, and structural components should ALWAYS be OEM. Cosmetic parts (grille, mirror caps) can be aftermarket if quality-verified.
- Get a written supplement authorization process. Hidden damage discovered during teardown is normal. You want a shop that pauses, photographs, calls the insurer for supplement approval, then continues — not one that just eats the extra cost or bills you.
- Confirm rental car coverage. Most policies include rental reimbursement up to a daily limit (usually $30-$50/day). For a Chevy Camaro owner, most policies fully cover a similar-class rental.
The Chevy Camaro paint code decode
Every touch-up or panel refinish starts with your paint code. On the Chevy Camaro, it’s on the driver-side door jamb sticker (open the driver’s door and look at the frame). Look for a 3-4 character code labeled “PAINT”, “COLOR”, “C/TR”, or “EXT”. Photograph the entire sticker — it also contains your VIN, GVWR, and manufacture date.
Why the code matters: A mismatched paint job is the single most common complaint after body repair. On Chevy Camaro factory colors, even one shade off is visible in daylight. Give your shop the exact code — don’t let them “eyeball match” or use “close enough” formulas.
Aftermarket touch-up bottles (like Dupli-Color Perfect Match) are mixed by code and are excellent for chips and small scratches. For panel-size refinishing, professional shops use PPG, BASF Glasurit, or Sherwin-Williams Ultra 9K systems mixed to your exact code.
ADAS calibration: the Chevy Camaro step most cheap shops skip
Advanced Driver Assistance Systems (ADAS) — adaptive cruise, lane keeping, automatic emergency braking, blind spot, rear cross-traffic — all rely on cameras and radars mounted around the vehicle. Even a bumper cover replacement can knock these sensors out of alignment. A shop that skips calibration is handing you back a Chevy Camaro whose safety systems don’t know where they are.
Static vs. dynamic calibration:
- Static: Vehicle stays in the shop with targets set up around it in a controlled space. Typical time: 2-4 hours. Cost: $350-$750.
- Dynamic: Technician drives the vehicle on specific roads at specific speeds while the system recalibrates. Typical time: 1-2 hours. Cost: $200-$450.
- Combined: Most Chevy Camaro systems require both. Total cost: $550-$1,250.
How to verify it happened: Ask for the pre-scan and post-scan reports (printed diagnostic printouts). Any legitimate shop generates these and keeps copies. If a shop can’t produce them, they didn’t do the calibration.
Panel-by-panel Chevy Camaro repair walkthrough
Front bumper cover
Small scuffs and shallow scratches under 4 inches long are DIY-repairable in a driveway on a warm day. Wash the area with soap and water, then wipe with isopropyl alcohol. Sand progressively with 400 → 800 → 1500 grit wet-sand paper. Apply primer if you’ve broken through to plastic, then color-matched touch-up in 3-4 light coats (wait 10 minutes between coats). Finish with clear coat and let cure 48 hours before polishing. Total materials: $25-$45. Total time: 2-3 hours plus cure.
Cracks, tears, or holes require plastic welding or bumper replacement. Bumper replacement on the Chevy Camaro runs $1,150–$2,150 at a shop.
Fender damage
Steel fender dents under 3 inches with intact paint are candidates for paintless dent repair (PDR). A mobile PDR tech can restore a small dent for $75-$175. Larger damage, paint cracking, or a torn fender requires conventional repair or replacement.
Hood damage
Hood damage is deceptively expensive. Even a small dent often requires full repaint of the entire hood to hide blending — a hood is one continuous panel with no natural break points. Hail damage across the hood is best handled by a dedicated hail specialist (PDR) rather than conventional bodywork.
Door damage
Doors are the most repair-friendly panel on the Chevy Camaro. Interior door panels remove easily for PDR access, and doors bolt on/off cleanly if replacement is needed. Watch for damage to internal components: window regulator, side airbag sensor (in the door frame), speakers, wiring harness. A collision that dented a door often broke one of these — a good shop tests everything before reinstalling.
Rear quarter panel
Quarter panels are welded to the body — replacement is major surgery involving cutting the old panel out, welding in a new one, sealing seams, and refinishing. Quarter panel work legitimately costs $2,500-$5,500 and takes 12-18 shop hours. Anyone quoting significantly less is either using body filler to hide damage or skipping structural welding steps.
What to inspect BEFORE accepting delivery
The moment you sign off on the repair, your leverage disappears. Spend 30 minutes doing a thorough walk-through before you drive home. Bring a friend if you can — a second set of eyes catches what you miss.
Paint inspection (in sunlight — never fluorescent shop lights)
- Match: examine repaired panels next to adjacent originals from multiple angles. Metallic and pearl finishes especially show mismatch as you walk around.
- Orange peel: excessive texture in the clear coat that’s more pronounced than factory finish
- Runs and sags: vertical drips in the paint (shop tried to lay it on too heavy)
- Fisheye: small crater-like defects from contamination
- Dust nibs: small bumps trapped in clear coat
- Overspray on adjacent panels, glass, trim, wheels, or tires
Panel gaps and alignment
Every panel gap should be consistent width all the way around. Common problems: hood higher on one side than the other, door gap wider at top than bottom, bumper cover misaligned with fender. Compare repaired-side gaps to non-repaired-side gaps — they should match.
Function tests
- Every door opens and latches smoothly
- Windows go up/down fully — no rubbing or hesitation
- Locks work from all doors and key fob
- All lights work: headlights, high beam, turn signals, brake, reverse, fog, running
- Wipers, washer sprayers, and horn
- Air conditioning blows cold from all vents (a bent condenser is common hidden damage)
- Radio, backup camera, parking sensors, and touchscreen respond normally
- Warning lights on dash: none illuminated after startup
Documentation
- Written warranty on paint and labor (lifetime on labor, minimum 5 years on paint is industry standard)
- Copy of pre-scan and post-scan reports
- List of parts used, with OEM part numbers
- ADAS calibration certificate if applicable
- Photos of the repair in progress (a good shop offers these unprompted)
Post-repair checklist for the first 30 days
- Days 1-2: Don’t wash the car. Fresh paint needs to fully outgas.
- Days 3-30: Hand wash only with pH-neutral soap. No automated car washes with brushes.
- Days 1-90: Avoid waxing, sealing, or ceramic coating. Paint continues curing for up to 90 days.
- Days 1-90: Park in shade when possible. Direct sun accelerates cure but can cause micro-cracks.
- Days 1-90: No parking under trees (sap), near construction (dust), or where bird droppings are likely — they etch fresh clear coat.
- Any time: If a warning light appears, panel starts creaking, or paint develops bubbles or peeling, return to the shop immediately. Warranty issues resolve fastest when reported early.
Insurance-specific advice for Chevy Camaro owners
The Chevy Camaro is a strong candidate for full coverage through year 10-12 because the repair-to-value ratio stays favorable. After that, consider dropping collision if your deductible + potential repair costs approach the market value of the vehicle.
Diminished value claims: After any repair, your Chevy Camaro’s trade-in and private sale value drops even if the repair is perfect — this is called “diminished value” and is a recoverable insurance claim in most states (against the at-fault driver’s insurer, not your own). For a repair over $5,000, diminished value typically ranges 10-25% of the repair cost. It’s rarely offered proactively — you have to file a separate claim with documentation.