
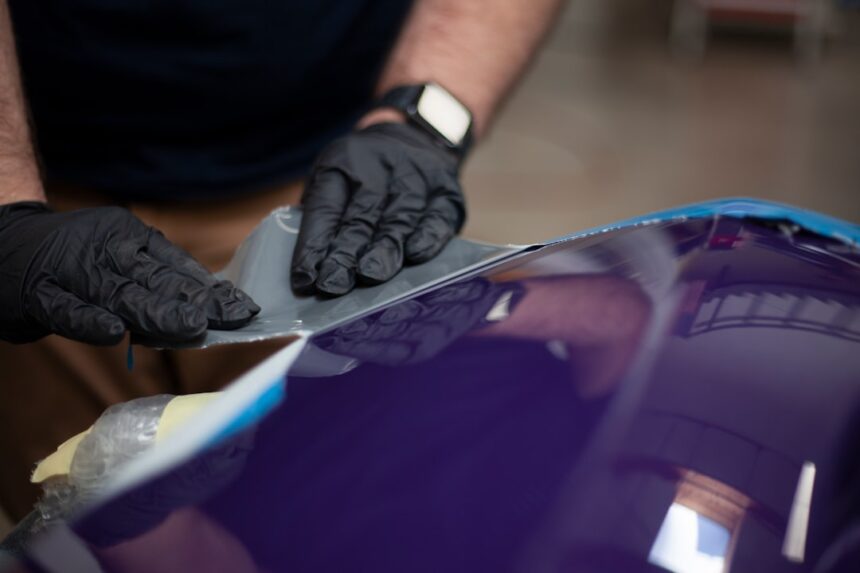
Professional PPF installation costs $1,500-6,000. DIY pre-cut kits for the front bumper + hood + mirrors run $250-500 in materials — and the process is genuinely learnable in one weekend if you follow the right sequence.
What PPF Actually Is
PPF (Paint Protection Film) is a 6-8 mil thick urethane film that adheres to painted surfaces via a semi-permanent adhesive. It absorbs rock chips, road debris impacts, minor abrasions, and light chemical exposure. Self-healing PPF (most modern films) uses heat to erase minor scratches in the film itself — direct sun or hair dryer heat “resets” the film’s smooth surface.
Get 3 free quotes from local body shops
We match you with verified shops. Response within 24 hours.
Get my free quotes →Where PPF Is Actually Worth It
Full-car PPF costs $3,500-8,000 pro. Full DIY is possible but not recommended for first-timers. Focus on high-impact areas that give 80% of the protection benefit for 20% of the cost:
Highest-value areas (do these first)
- Front bumper — takes 90% of rock chips
- Hood leading edge (12 inches back) — highway rock chip zone
- Front fenders — chip catchers
- Side mirrors — get hit by everything
- A-pillars (windshield frame edges) — highway bug residue etches paint here
Medium-value areas
- Full hood
- Door edges (from other cars in parking lots)
- Rocker panels (road spray)
- Trunk lip (from bags being placed)
Low-value areas (usually not worth it)
- Roof (only makes sense if you regularly drive under low branches)
- Quarter panels (rarely hit by anything)
Pre-Cut Kit vs Bulk Film
Pre-cut kits — Recommended for DIY
Films are cut on a plotter to fit your specific vehicle’s panels. You get a bag of pre-shaped pieces. Much easier to install because no measuring or cutting.
- XPEL Pre-Cut PPF Kits — $150-400 per section
- 3M Pro Series Pre-Cut Kits — $120-350 per section
Bulk film — For irregular shapes or full car
You cut the film yourself. Requires plotter or careful hand-cutting. Not recommended for first attempt.
Materials & Tools
- Pre-cut PPF kit (vehicle-specific) — $150-400 per section
- Slip solution + tack solution (or make your own — see below) — $20-40
- Squeegee kit (multiple hardnesses) — $30-60
- Heat gun (variable temp) — $30-70
- Cutting tool + fresh blades — $20-40
- Prep solution (IPA-based) — $15-30
- Lint-free microfiber towels — $25-40
- Two spray bottles — $15-25
- Nitrile gloves — $15-25
DIY slip solution recipe (saves $20-30)
1 gallon distilled water + 1-2 drops of baby shampoo. That’s it. Commercial slip solutions are 95% water + surfactant. Baby shampoo is the safest surfactant for PPF adhesive.
Prep — 60% of Install Quality
PPF only sticks to a completely clean, decontaminated surface. Skipping prep is why DIY installs fail.
Prep sequence
- Wash the vehicle with pH-neutral soap. Rinse thoroughly.
- Iron decon spray + rinse (removes brake dust particles that would show through film).
- Clay bar the panels getting PPF (removes bonded contaminants).
- Wipe with 70% isopropyl alcohol on lint-free microfiber. This is critical — removes any waxes, sealants, or polishes that would prevent adhesion.
- Repeat IPA wipe with a fresh, clean cloth.
- Do NOT touch the prepped surface with bare hands — skin oils prevent adhesion. Use nitrile gloves.
- Move to a garage or shaded, wind-free area. Dust in the air = dust under film = permanent imperfection.
Installation Process — Front Bumper Example
Phase 1: Position (10-15 min)
- Peel about 6 inches of backing off the film’s top edge.
- Spray the exposed adhesive side with slip solution (soaks the adhesive — makes it repositionable).
- Spray the vehicle’s paint with slip solution (creates a “swimming” layer).
- Place the film on the panel — because both surfaces are wet with slip, the film glides for positioning.
- Align edges — reference the pre-cut piece’s shape to the panel’s features (headlight, license plate cutouts, etc.).
- Once aligned, the slip solution begins to dissipate and the adhesive starts to grab.
Phase 2: Central Squeegee (15-25 min)
- Starting at the center of the panel, squeegee outward with firm, overlapping strokes.
- Use a hard squeegee for flat areas, soft squeegee for curves.
- Push all slip solution and air bubbles out toward the edges.
- Work in overlapping ~60° arcs, never lift and reset — always maintain contact.
- Bubbles that don’t want to squeegee out: lift the film corner slightly, spray more slip, re-squeegee.
Phase 3: Heat & Wrap Curves (20-40 min)
- For curved sections (bumper corners, headlight surrounds), heat the film with the heat gun on low (250-300°F).
- Heat makes the film pliable — it stretches to conform to compound curves.
- Stretch gently and squeegee simultaneously. Don’t force it — micro-tears form under too much stretch.
- For sharp inside corners, use a razor-sharp blade to make relief cuts. Overlap the resulting flaps and heat to bond.
Phase 4: Edge Tucking (15-25 min)
Where film meets a panel edge (behind bumper, into wheel arch), you need to tuck the excess:
- Heat the film edge until pliable.
- Use a squeegee wrapped in microfiber (protects the paint) to push the excess film underneath the panel edge.
- The adhesive bonds it to the underside — invisible from front view.
Phase 5: Trim Excess (10-15 min)
If the pre-cut kit left extra material, trim with a fresh blade:
- Position the blade perpendicular to the film.
- Cut in one smooth motion — don’t saw back and forth.
- Use very light pressure — you’re cutting film, not paint.
Phase 6: Cure (24-72 hours)
The adhesive continues to bond for 24-72 hours after install:
- No water contact for 48 hours (no rain, no car wash)
- Small bubbles under the film may evaporate over the first 48 hours — don’t try to squeegee them out immediately
- Full adhesion in 5-7 days
Common Failures
Bubbles that won’t go away
Cause: dirt or dust trapped under film during install. Fix: puncture with a fresh #11 blade (poke, don’t cut), squeegee out. Small bubbles usually invisible; large ones require film replacement.
Film peels at edges within a month
Cause: skipped IPA prep, or oil/wax contamination. Fix: remove that section, reprep, reinstall (or use liquid PPF sealer on edges).
Fingerprints visible under film
Cause: touched the paint or adhesive with bare hands. Fix: remove that section, reprep, reinstall. Preventable with nitrile gloves.
Film cracks in cold weather
Cause: over-stretched during install (thinner than designed). Fix: replace section. Prevention: work slowly, use more heat instead of more stretch.
Yellow discoloration after 2-3 years
Cause: cheap film without proper UV inhibitors. Fix: replace with better brand (XPEL, 3M). Prevention: buy quality film upfront.
Time Estimates
- Front bumper (pre-cut): 60-90 minutes for a first-time installer
- Hood (partial or full): 90 minutes to 2.5 hours
- Full front-end kit (bumper + hood + fenders + mirrors + A-pillars): 6-10 hours spread over 1-2 days
- Full car: 20-40 hours (not recommended for first attempt)
What DIY Actually Delivers
First-time DIY: 85-92% of pro quality. Second/third attempt: 95%+. Under close inspection at 6 inches, you’ll see slight edge alignment differences vs. pro install. From 5 feet, indistinguishable.
The tradeoff: $300-500 in supplies vs. $2,000-4,000 pro install for the front end. Saves $1,500-3,500 for the same functional protection.
Frequently Asked Questions
Can I install PPF outside?
Only if it’s a still, overcast day with low humidity. Any breeze blows dust onto the panel; any sun bakes the slip solution off too fast. Garage installation strongly preferred.
Do I need to remove wheels and bumpers?
For pro-quality results, yes. Removing the bumper cover lets you wrap edges cleanly and hide the film’s edge lines. For DIY on daily drivers, most people skip this and accept minor edge visibility.
How long does PPF last?
Quality film (XPEL, 3M, SunTek): 7-10 years. Budget film: 3-5 years. All PPF eventually yellows and needs replacement.
Can I wash and wax over PPF?
Yes — treat it like normal paint. Avoid abrasive polishes and rubbing compounds directly on PPF (they can dull the film). Ceramic coating over PPF is compatible and extends the film’s life.