
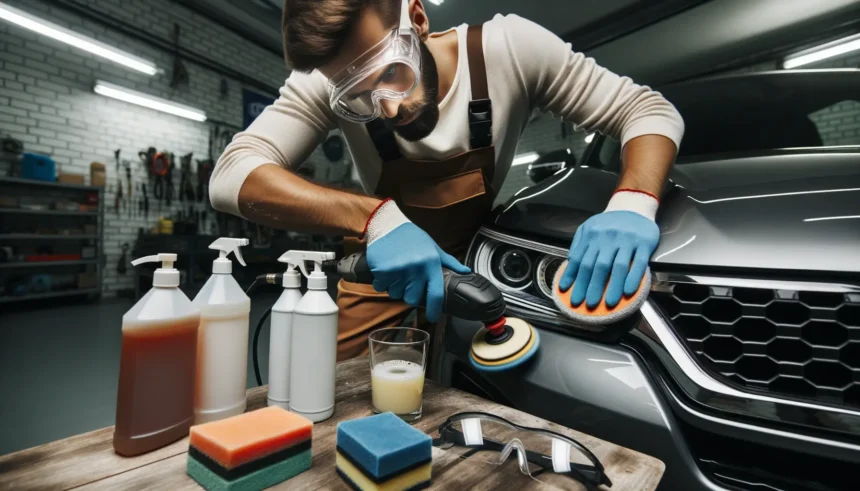
Understanding Different Types of Scratches
Recommended: fix scratches yourself
Handpicked Amazon products relevant to this guide. Prices vary, links go to current Amazon listings.
When it comes to repairing scratches, it is important to first understand the different types of scratches that can occur. By identifying the type of scratch, you can determine the best method for repair and ensure that you achieve the desired results.
One common type of scratch is a surface scratch. These scratches are typically shallow and only affect the clear coat of the paint. They are often caused by light contact with a rough surface or by brushing against a sharp object. Surface scratches are usually easy to repair and can often be buffed out using a mild abrasive compound.
Another type of scratch is a deep scratch. These scratches penetrate through the clear coat and into the base coat or primer layer. Deep scratches are often caused by more significant contact with a rough surface or by a sharp object. Repairing deep scratches can be more challenging and may require touch-up paint or even professional assistance.
It is also important to consider the location of the scratch. Scratches on horizontal surfaces, such as the hood or roof of a car, are more prone to damage from the elements and may require more extensive repair. Vertical surfaces, such as doors or fenders, are less likely to be affected by weathering and may be easier to repair.
In addition to surface and deep scratches, there are also different types of scratches based on the material being scratched. For example, scratches on glass surfaces require different repair techniques than scratches on metal or plastic surfaces. It is important to consider the material being scratched when determining the best method for repair.
When repairing scratches, it is also important to consider the size of the scratch. Small scratches can often be repaired using DIY methods, while larger scratches may require professional assistance. It is important to assess the size of the scratch and determine if it is within your skill level to repair.
Furthermore, the severity of the scratch should be taken into account. Minor scratches may only require a simple touch-up, while more severe scratches may require sanding, filling, and repainting. It is important to carefully assess the severity of the scratch and determine the appropriate repair method.
Lastly, it is important to consider the color of the scratched surface. Matching the color of the repair to the original color is crucial for achieving a seamless finish. Different materials and surfaces may require different paint or touch-up methods to ensure a perfect color match.
In conclusion, understanding the different types of scratches is essential for effective repair. By identifying the type, location, material, size, severity, and color of the scratch, you can determine the best method for repair. Whether it is a surface scratch or a deep scratch, on glass or metal, small or large, minor or severe, matching the color or not, there is a suitable repair method for every type of scratch. Taking the time to understand these factors will help you achieve the best results and restore the appearance of your scratched surface.

Essential Tools and Materials for Scratch Repair
When it comes to repairing a scratch, having the right tools and materials is essential. Whether it’s a scratch on your car, furniture, or any other surface, having the proper equipment will ensure a successful repair. In this article, we will discuss the essential tools and materials needed for scratch repair.
First and foremost, you will need a good quality scratch repair kit. These kits typically include everything you need to repair minor scratches, such as a rubbing compound, polishing compound, and a microfiber cloth. It’s important to choose a kit that is specifically designed for the type of surface you are working on. For example, if you are repairing a scratch on your car, make sure to choose a kit that is formulated for automotive use.
In addition to a scratch repair kit, you will also need some basic tools. A soft cloth or sponge is essential for applying the rubbing compound and polishing compound. It’s important to choose a cloth or sponge that is gentle enough not to further damage the surface but also effective enough to remove the scratch. Microfiber cloths are often recommended for this purpose as they are soft and non-abrasive.
Another tool that can be helpful is a sanding block or sandpaper. This is particularly useful for deeper scratches that cannot be easily repaired with a rubbing compound alone. The sanding block or sandpaper should have a grit that is appropriate for the surface you are working on. It’s important to be cautious when using sandpaper, as too much pressure or the wrong grit can cause further damage.
When it comes to materials, you will need a rubbing compound and a polishing compound. The rubbing compound is used to remove the scratch by gently buffing the surface. It works by removing a thin layer of the surrounding material, effectively leveling out the scratch. The polishing compound is then used to restore the shine and smoothness of the surface. Both compounds should be applied using a soft cloth or sponge in a circular motion.
In addition to the compounds, you may also need some touch-up paint or a clear coat for certain types of scratches. This is particularly true for automotive repairs, where the scratch may have penetrated the paint layer. Touch-up paint can be used to fill in the scratch, while a clear coat can be applied to protect the repaired area and blend it with the surrounding paint.
Lastly, it’s important to have a clean and well-lit workspace. Before starting the repair, make sure to clean the surface thoroughly to remove any dirt or debris that could interfere with the repair process. A well-lit workspace will allow you to see the scratch clearly and ensure that you are applying the compounds and materials correctly.
In conclusion, having the right tools and materials is crucial for a successful scratch repair. A good quality scratch repair kit, along with basic tools such as a soft cloth or sponge, and a sanding block or sandpaper, will help you achieve the best results. Additionally, using the appropriate compounds, touch-up paint, and clear coat will ensure a seamless repair. Remember to work in a clean and well-lit workspace to achieve the best possible outcome.

Step-by-Step Guide to Repairing Minor Scratches
Scratches on our beloved possessions can be quite frustrating. Whether it’s a scratch on your car, furniture, or electronic device, it can be an eyesore that diminishes the overall appearance. Fortunately, many minor scratches can be repaired at home with a few simple steps. In this step-by-step guide, we will walk you through the process of repairing minor scratches, helping you restore the beauty of your belongings.
Firstly, before diving into the repair process, it’s important to assess the severity of the scratch. Minor scratches are those that have only affected the surface layer, while deeper scratches may require professional assistance. To determine the depth of the scratch, run your fingernail across it. If your nail catches on the scratch, it is likely deeper and may require professional attention.
Once you have determined that the scratch is minor, the first step is to clean the area surrounding the scratch. Use a mild soap and water solution to gently clean the surface, removing any dirt or debris that may be present. This will ensure that the repair process is effective and that no additional damage is caused during the repair.
After cleaning the area, the next step is to prepare the scratch for repair. Using a fine-grit sandpaper, gently sand the scratch in a back-and-forth motion. This will help smooth out any rough edges and create a surface that is easier to work with. Be careful not to apply too much pressure, as this can cause further damage.
Once the scratch has been sanded, it’s time to apply a scratch repair compound. These compounds are specifically designed to fill in and conceal minor scratches. Apply a small amount of the compound to a clean, soft cloth and gently rub it into the scratch using circular motions. Continue rubbing until the compound is evenly distributed and the scratch is no longer visible.
After applying the scratch repair compound, it’s important to let it dry completely. This may take a few minutes or up to an hour, depending on the product used. Avoid touching or applying any pressure to the repaired area during this time to ensure the best results.
Once the compound has dried, it’s time to assess the repair. If the scratch is still visible, repeat the process of applying the scratch repair compound and allowing it to dry. In some cases, multiple applications may be necessary to completely conceal the scratch.
Finally, once the scratch has been repaired to your satisfaction, it’s important to protect the area to prevent future damage. Applying a clear coat or wax can help seal the repaired area and provide an extra layer of protection against scratches. Be sure to follow the manufacturer’s instructions when applying any protective coating.
In conclusion, repairing minor scratches can be a simple and cost-effective way to restore the appearance of your belongings. By following these step-by-step instructions, you can confidently repair scratches on your car, furniture, or electronic devices. Remember to assess the severity of the scratch, clean the area, sand the scratch, apply a scratch repair compound, let it dry, assess the repair, and protect the area. With a little time and effort, you can say goodbye to those unsightly scratches and enjoy your belongings once again.

Effective Techniques for Removing Deep Scratches
Deep scratches on surfaces can be unsightly and frustrating to deal with. Whether it’s on your car, furniture, or any other valuable item, knowing how to effectively repair a scratch can save you time and money. In this article, we will explore some effective techniques for removing deep scratches.
One of the most common methods for repairing deep scratches is by using a scratch repair kit. These kits typically include a compound or polish that helps to fill in the scratch and make it less noticeable. To use a scratch repair kit, start by cleaning the surface around the scratch to remove any dirt or debris. Then, apply a small amount of the compound or polish to a clean cloth and gently rub it into the scratch in a circular motion. Continue rubbing until the scratch becomes less visible. Finally, wipe away any excess compound or polish and buff the area to a shine.
Another technique for removing deep scratches is by using toothpaste. Yes, you read that right – toothpaste! Toothpaste contains mild abrasives that can help to buff out scratches. To use toothpaste for scratch repair, start by cleaning the surface around the scratch. Then, apply a small amount of toothpaste to a clean cloth and gently rub it into the scratch using circular motions. Continue rubbing for a few minutes, adding more toothpaste if necessary. Once the scratch starts to fade, wipe away any excess toothpaste and buff the area to a shine.
If you’re dealing with a deep scratch on your car, touch-up paint may be the solution. Touch-up paint is specifically designed to match the color of your car’s paint and can be used to fill in deep scratches. To use touch-up paint, start by cleaning the area around the scratch and removing any loose paint or debris. Then, apply a small amount of touch-up paint to a fine brush and carefully fill in the scratch. Allow the paint to dry completely before applying a clear coat to protect the repair. Remember to follow the manufacturer’s instructions for best results.
For wooden surfaces, such as furniture or flooring, there are specific techniques for repairing deep scratches. One method is to use a wax stick or crayon that matches the color of the wood. Start by cleaning the area around the scratch and removing any dirt or debris. Then, rub the wax stick or crayon over the scratch, filling it in completely. Use a plastic scraper or your finger to smooth out the wax and blend it with the surrounding wood. Finally, buff the area with a soft cloth to restore the shine.
In conclusion, deep scratches can be effectively repaired using various techniques. Scratch repair kits, toothpaste, touch-up paint, and wax sticks are all useful tools for removing deep scratches from different surfaces. Remember to clean the area before starting the repair process and follow the instructions provided with the products for best results. With a little patience and effort, you can restore the appearance of your valuable items and make those deep scratches a thing of the past.
Tips for Preventing Scratches on Different Surfaces
Scratches can be a frustrating and unsightly problem on various surfaces, from furniture to cars. Fortunately, there are several preventive measures you can take to minimize the risk of scratches. By following these tips, you can keep your belongings looking their best and avoid the hassle of repairing scratches.
When it comes to wooden furniture, prevention is key. Start by using coasters and placemats to protect the surface from hot dishes, spills, and scratches caused by rough objects. Avoid dragging items across the furniture, as this can easily leave marks. Instead, lift and place objects gently. Additionally, consider using furniture pads or felt protectors on the bottom of chairs, tables, and other furniture to prevent scratches caused by movement.
For glass surfaces, such as windows and tabletops, it’s important to be mindful of the objects you place on them. Avoid placing sharp or abrasive items directly on the glass, as they can easily scratch the surface. Instead, use coasters or mats to create a protective barrier. When cleaning glass, use a soft cloth or sponge to avoid scratching the surface with abrasive materials. Be cautious when using glass cleaners, as some may contain chemicals that can damage the glass.
When it comes to electronic devices, such as smartphones and tablets, investing in a screen protector is a wise choice. These thin films adhere to the screen and provide an extra layer of protection against scratches. Additionally, consider using a protective case to shield your device from accidental drops and bumps. Avoid placing your electronic devices in pockets or bags with sharp objects, as they can easily scratch the screen. Regularly cleaning your device with a microfiber cloth can also help remove dirt and debris that may cause scratches.
Preventing scratches on cars requires a bit more effort. Start by parking your car in a garage or shaded area to protect it from the elements. When washing your car, use a soft sponge or microfiber cloth to avoid scratching the paint. Be cautious when using automatic car washes, as the brushes and equipment may cause scratches. Instead, opt for hand washing or touchless car washes. Applying a protective wax or sealant can also help prevent scratches and keep your car looking shiny and new.
In the kitchen, preventing scratches on stainless steel appliances and cookware is essential. Avoid using abrasive cleaners or scrub brushes, as they can easily scratch the surface. Instead, opt for gentle cleaning solutions and soft cloths. When cooking, use wooden or silicone utensils to avoid scratching non-stick pans and other surfaces. Be mindful of the pots and pans you use, as rough bottoms can cause scratches on stovetops and countertops.
In conclusion, preventing scratches on different surfaces requires a combination of caution and protective measures. By following these tips, you can minimize the risk of scratches and keep your belongings looking their best. Remember to use coasters, mats, and protective films, and be mindful of the objects you place on surfaces. Regular cleaning and gentle handling are also key to preventing scratches. With these preventive measures in place, you can enjoy scratch-free surfaces for years to come.
Exploring DIY Scratch Repair Kits
Scratches on our beloved possessions can be a real eyesore. Whether it’s a scratch on our car, furniture, or electronic devices, it’s natural to want to find a solution to repair them. While professional repairs can be costly, there is an alternative option that has gained popularity in recent years: DIY scratch repair kits. These kits offer an affordable and convenient way to fix minor scratches at home. In this article, we will explore the world of DIY scratch repair kits, discussing their benefits, how they work, and some tips for using them effectively.
One of the main advantages of DIY scratch repair kits is their cost-effectiveness. Professional repairs can often be expensive, especially for minor scratches. With a DIY kit, you can save money by doing the repairs yourself. These kits typically come at a fraction of the cost of professional services, making them an attractive option for budget-conscious individuals.
But how do these kits actually work? Most DIY scratch repair kits contain a combination of compounds and materials designed to fill in and conceal scratches. These compounds are usually formulated to match the color and texture of the surface being repaired, ensuring a seamless finish. The process typically involves cleaning the scratched area, applying the compound, and then buffing it to blend it with the surrounding surface. While the exact steps may vary depending on the kit, most come with detailed instructions that guide you through the process.
When using a DIY scratch repair kit, it’s important to follow the instructions carefully. Start by cleaning the scratched area thoroughly to remove any dirt or debris. This will ensure that the compound adheres properly to the surface. Next, apply the compound using the provided applicator or a soft cloth, making sure to cover the entire scratch. Allow the compound to dry according to the instructions, and then use a buffing cloth or pad to gently polish the area. This will help blend the repaired area with the rest of the surface, creating a seamless finish.
While DIY scratch repair kits can be effective for minor scratches, it’s important to note that they may not be suitable for deep or extensive damage. If you have a deep scratch or a large area that needs repair, it may be best to consult a professional. Additionally, it’s worth mentioning that DIY kits may not provide a permanent solution. Depending on the severity of the scratch and the quality of the kit, the repaired area may fade or wear off over time. However, for small scratches and touch-ups, these kits can be a convenient and cost-effective solution.
In conclusion, DIY scratch repair kits offer an affordable and convenient way to fix minor scratches at home. With their cost-effectiveness and ease of use, these kits have become increasingly popular among individuals looking to repair scratches on their cars, furniture, and electronic devices. By following the instructions carefully and using the provided compounds and materials, you can achieve a seamless finish and restore the appearance of your scratched possessions. While DIY kits may not be suitable for deep or extensive damage, they can be a great option for small scratches and touch-ups. So, next time you notice a scratch, consider giving a DIY scratch repair kit a try and see the difference it can make.
Professional Scratch Repair Services: Pros and Cons
When it comes to repairing scratches on your car, you have two options: doing it yourself or hiring a professional scratch repair service. While DIY methods may seem cost-effective, they often fall short in delivering the desired results. This is where professional scratch repair services come into play. In this article, we will explore the pros and cons of opting for professional scratch repair services.
One of the biggest advantages of hiring a professional scratch repair service is the expertise they bring to the table. These professionals have years of experience in dealing with various types of scratches and know the best techniques to fix them. They have access to specialized tools and products that are not readily available to the average consumer. This means that they can achieve a higher quality repair job compared to DIY methods.
Another benefit of professional scratch repair services is the time and effort they save you. Repairing scratches can be a time-consuming and tedious task, especially if you lack the necessary skills and tools. By hiring professionals, you can free up your time and focus on other important tasks while they take care of the repairs. Additionally, professionals can complete the job much faster than an amateur, ensuring that your car is back to its pristine condition in no time.
Professional scratch repair services also offer a level of convenience that DIY methods cannot match. Instead of spending hours researching and experimenting with different techniques, you can simply drop off your car at the repair shop and let the professionals handle the rest. They will assess the damage, provide you with an estimate, and carry out the necessary repairs. This convenience factor is particularly beneficial for individuals with busy schedules or those who lack the confidence to tackle the repairs themselves.
However, it is important to consider the potential drawbacks of professional scratch repair services as well. One of the main concerns is the cost. Hiring professionals can be more expensive than purchasing DIY scratch repair kits or products. The price will vary depending on the extent of the damage and the reputation of the repair service. It is advisable to obtain multiple quotes and compare them before making a decision.
Another potential drawback is the risk of damage to your car’s paintwork. While professionals are skilled in their craft, accidents can happen. It is crucial to choose a reputable repair service that offers guarantees or warranties to protect you in case of any mishaps. Additionally, some repair techniques, such as wet sanding, may remove a thin layer of paint, which could affect the overall appearance of your car.
In conclusion, professional scratch repair services offer several advantages over DIY methods. Their expertise, access to specialized tools, and time-saving capabilities make them a viable option for those seeking high-quality repairs. However, the cost and potential risks associated with professional services should also be taken into consideration. Ultimately, the decision to hire professionals or attempt a DIY repair depends on your budget, time constraints, and confidence in your own abilities.

Common Mistakes to Avoid When Repairing Scratches
When it comes to repairing scratches, it’s important to approach the task with caution and precision. While it may seem like a simple fix, there are several common mistakes that people often make when attempting to repair scratches on their own. In this article, we will discuss these mistakes and provide tips on how to avoid them.
One of the most common mistakes people make when repairing scratches is using the wrong materials. It’s crucial to use the appropriate tools and products for the specific type of scratch you are dealing with. Using the wrong materials can not only worsen the scratch but also damage the surrounding area. Before starting any repair work, make sure to research and gather the necessary materials.
Another mistake to avoid is rushing the repair process. Repairing scratches requires patience and attention to detail. Many people make the mistake of trying to fix the scratch quickly, resulting in a sloppy and ineffective repair job. Take your time and follow the proper steps to ensure a successful outcome.
Furthermore, neglecting to clean the surface properly before attempting to repair a scratch is a common mistake. Dirt, dust, and debris can hinder the effectiveness of the repair process. Before applying any products or tools, thoroughly clean the area to remove any contaminants. This will ensure that the repair materials adhere properly and provide a seamless finish.
Additionally, applying too much pressure when repairing a scratch can cause further damage. It’s important to use a gentle touch and apply even pressure to avoid creating additional scratches or dents. Start with light pressure and gradually increase if necessary. Remember, the goal is to repair the scratch, not make it worse.
Another mistake to avoid is neglecting to protect the surrounding area. When repairing a scratch, it’s essential to take precautions to prevent any accidental damage to the surrounding paint or surface. Using masking tape or a protective film can help create a barrier and ensure that only the scratched area is being worked on.
Furthermore, failing to follow the manufacturer’s instructions is a common mistake that can lead to subpar results. Different products and tools have specific instructions for use, and it’s important to follow them carefully. This will ensure that you achieve the desired outcome and avoid any unnecessary mistakes.
Lastly, not seeking professional help when needed is a mistake that many people make. While DIY repairs can be cost-effective, there are instances where professional assistance is necessary. If you are dealing with a deep or extensive scratch, it’s best to consult a professional who has the expertise and experience to handle the repair properly.
In conclusion, repairing scratches requires careful attention to detail and avoiding common mistakes. Using the wrong materials, rushing the repair process, neglecting to clean the surface, applying too much pressure, failing to protect the surrounding area, not following instructions, and not seeking professional help when needed are all mistakes to avoid. By being mindful of these common pitfalls, you can successfully repair scratches and restore the appearance of your surfaces.