
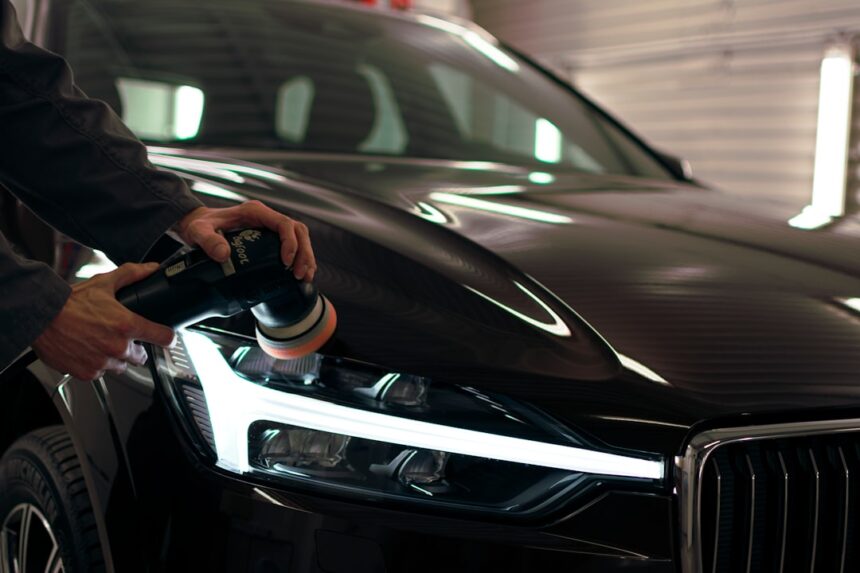
Machine polishing can remove 90% of clear-coat scratches, swirl marks, and light oxidation in an afternoon — the same work costs $400-1,200 at a detail shop. The difference between an amateur trying it and a pro is knowing the exact combination of pad, compound, machine speed, and pressure for the defect you’re chasing.
Scratch Depth Diagnosis — The Fingernail Test
Before you touch a polisher, know what you’re dealing with. Run your fingernail perpendicular to the scratch:
Nail slides over smoothly = clear-coat only
The scratch lives entirely in the clear coat. 100% fixable by machine polishing. Removing 25-40 microns of clear coat with a light-cut process makes it disappear.
Nail catches slightly = through clear, into base color
Machine polishing can improve appearance but won’t fully remove. Combine with touch-up paint + wet sand for near-invisible result.
Nail catches strongly + you see gray/silver = through paint to primer or metal
Machine polishing can’t help. You need repaint. Skip to a body shop guide.
Get 3 free quotes from local body shops
We match you with verified shops. Response within 24 hours.
Get my free quotes →Machine Choice — DA vs Rotary
Dual-Action (DA) Polishers — What Almost Everyone Should Use
The pad simultaneously rotates AND oscillates (like a random-orbit sander). This dual motion is inherently safer:
- Won’t burn through clear coat unless you deliberately abuse it
- Beginner-friendly — the same technique works panel-to-panel
- Slower cutting means you have time to check progress
- Best DIY choice: Porter-Cable 7424XP ($130-180)
Rotary Polishers — For Experienced Users Only
Pad rotates in one direction only. Much more aggressive:
- Burns through clear coat in seconds if angled wrong
- Requires 20+ hours of practice on scrap panels first
- Corrects severe defects faster than DA
- Only choice for heavy oxidation or very deep swirl removal
For 95% of DIYers, DA is the right choice. This guide focuses on DA technique.
Pad + Compound Selection Matrix
| Defect Severity | Pad | Compound | Follow-up |
|---|---|---|---|
| Light swirls only | White polishing foam | Fine polish | Ceramic sealant |
| Medium swirls + light scratches | Orange cutting foam | Medium compound | White pad + polish |
| Deep swirls / oxidation | Yellow cutting foam | Heavy cutting compound | Orange pad + medium, then white + polish |
| Severe oxidation (old paint) | Wool cutting pad | Rubbing compound (heavy cut) | Yellow + medium, orange + medium, white + polish |
Recommended pad set
Chemical Guys Hex-Logic Pad Kit ($30-50) covers cutting, polishing, and finishing in one purchase.
Recommended compounds
- Meguiar’s Ultimate Compound — medium cut, safe for beginners ($15-22)
- Meguiar’s Ultimate Polish — finishing polish, brings gloss back ($15-22)
- 3M Perfect-It Rubbing Compound — heavier cut for oxidation ($20-30)
Machine Settings by Task
| Task | Speed (DA) | Pressure | Passes |
|---|---|---|---|
| Heavy cutting | 5-6 | Firm (7-10 lbs) | 6-8 slow passes |
| Medium cutting | 4-5 | Moderate (5-7 lbs) | 4-6 passes |
| Polishing | 3-4 | Light (3-5 lbs) | 3-4 passes |
| Finishing | 2-3 | Very light | 2-3 passes |
Step-by-Step Full Panel Correction Process
Phase 1: Test Spot First (30 min)
Never work the whole car without proving your process works. Pick a 2×2 ft area on the hood (biggest, flattest, most-abused panel).
- Wash and clay bar the test area
- Tape off a 1×1 ft “before” reference section for comparison
- Apply compound to pad — golf-ball-sized dollop
- Prime the pad: dab compound onto the panel in 4-5 spots
- Turn machine on at speed 3 to spread compound before increasing speed
- Work section at target speed and pressure
- Wipe area clean with microfiber
- Inspect under LED work light or in bright sun — compare to taped reference
Adjust pad + compound + speed until you find the combination that removes defects without leaving haze. This is now your recipe for the whole car.
Phase 2: Prep the Whole Vehicle (60-90 min)
- Two-bucket wash with grit guards
- Iron fallout decontamination (spray, dwell, rinse)
- Clay bar or clay mitt over entire painted surface
- Dry thoroughly with plush microfiber
- Mask off any painted plastic trim, rubber seals, badges (compound stains them)
Phase 3: Systematic Panel Work (3-8 hours depending on car size)
- Work one panel at a time in this order: roof → hood → trunk → doors (each side) → fenders → quarters → bumpers
- Divide each panel into 2×2 ft sections mentally
- Apply compound to pad
- Prime pad on the section (4-5 dabs of product on paint)
- Machine on speed 3, spread compound in a slow figure-8 or cross-hatch pattern
- Speed up to target (usually 4-5), work the section for 45-90 seconds
- Overlap each pass by 50%
- Slow down machine at end to speed 3, back away from panel
- Wipe residue with clean microfiber
- Inspect the section under strong light
- Move to next section
Phase 4: Two-Step vs One-Step Decision
If you used a heavy cut in Phase 3, your paint has micro-marring (fine hazing from the cutting compound). You need a polishing step:
- Switch to white polishing foam pad
- Apply finishing polish
- Same technique, but speed 3-4 and light pressure
- Work each section 30-60 seconds
- Wipe clean — paint should now look glossy and haze-free
Skip this step and your paint will look hazy under close inspection.
Phase 5: Seal or Coat (30-90 min)
Freshly-polished paint is unprotected — the previous wax/sealant is gone. Apply within 2 hours:
- Wax: Meguiar’s Ultimate Liquid Wax — 3-4 months protection
- Sealant: Turtle Wax Ceramic Spray — 6-12 months
- Ceramic coating: CarPro CQuartz UK 3.0 — 2-3 years
Common Mistakes and How to Fix Them
Hazing or “trails” after polishing
Cause: pad was too dry (not enough product), or compound wasn’t fully broken down. Fix: apply more compound to pad, work section again at lower speed.
Burn-through on edges or body lines
Cause: excessive pressure on high spots. Fix: irreversible — requires respray of the panel. Prevention: mask body lines with 3M tape before polishing.
Pigtail marks
Cause: DA sander was tilted, or backing plate is bent. Fix: replace backing plate, keep machine flat against surface.
Micromarring (fine scratches under strong light)
Cause: skipped the polishing step after cutting. Fix: run finishing polish with white pad.
Dust flying everywhere
Cause: too little compound, or pad clogged. Fix: apply fresh compound, or clean pad by spinning against a bristle brush.
Full Kit Investment
- Porter-Cable 7424XP DA polisher — $130-180
- Hex-Logic pad set (5-6 pads) — $30-50
- Meguiar’s Ultimate Compound — $15-22
- Meguiar’s Ultimate Polish — $15-22
- Microfiber towels (36-pack) — $25-40
- 3M masking tape — $10-15
- Ceramic coating (optional) — $130-180
- Total: $225-330 first time, $30-70 for subsequent details (consumables only)
Time Estimates by Vehicle
- Compact car: 4-6 hours (single-stage)
- Midsize sedan: 5-8 hours
- SUV / large truck: 7-12 hours
- Full two-step (cut + polish): 1.5-2x the single-stage time
Frequently Asked Questions
Can I burn through clear coat with a DA polisher?
Very rarely. It takes deliberate abuse — running the same spot for 5+ minutes at max speed with maximum pressure. Normal use is safe.
How much clear coat does polishing remove?
Light cut: 2-5 microns. Medium cut: 5-10 microns. Heavy cut: 10-25 microns. Total clear coat is typically 40-70 microns, so you can safely correct 2-3 times over a car’s life.
Do I need to wash and clay before polishing?
Absolutely. Polishing over dirt or contamination pushes those particles into the paint, causing more scratches than you started with.
Can I polish in direct sun?
No — compound flash-dries and won’t break down properly. Work in shade or overcast conditions. Panel temperature should be under 80°F.