

Understanding the Basics of Dent Repair
Recommended: fix small dents at home
Handpicked Amazon products relevant to this guide. Prices vary, links go to current Amazon listings.
When it comes to understanding the basics of dent repair, it is essential to have a clear understanding of the techniques and tools involved. Dent repair is the process of restoring the shape and appearance of a vehicle’s body panel after it has been dented or damaged. Whether it is a minor dent caused by a door ding or a more significant dent resulting from a collision, the principles of dent repair remain the same.
The first step in dent repair is assessing the damage on your vehicle. This involves thoroughly inspecting the dented area to determine the severity and extent of the damage. It is crucial to identify whether the dent has caused paint damage, as this will affect the repair process.
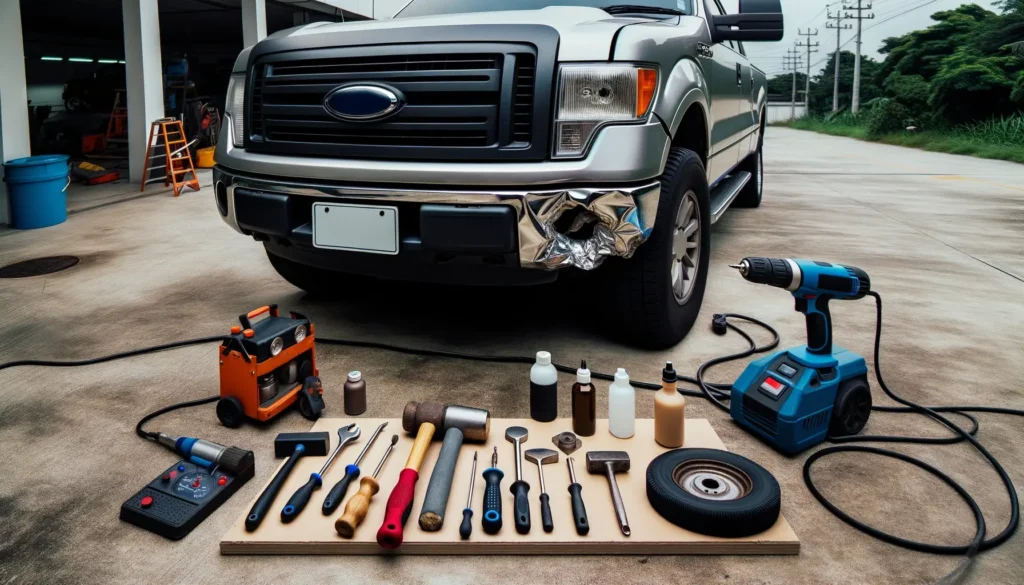
Once the damage has been assessed, the necessary tools for dent repair need to be gathered. These tools typically include items such as:
- Dent removal rods
- Suction cups
- Heat guns
- Body filler
- Sandpaper
- Paint
With these tools in hand, the surface can be prepared for repair, and the dent repair techniques can be applied.
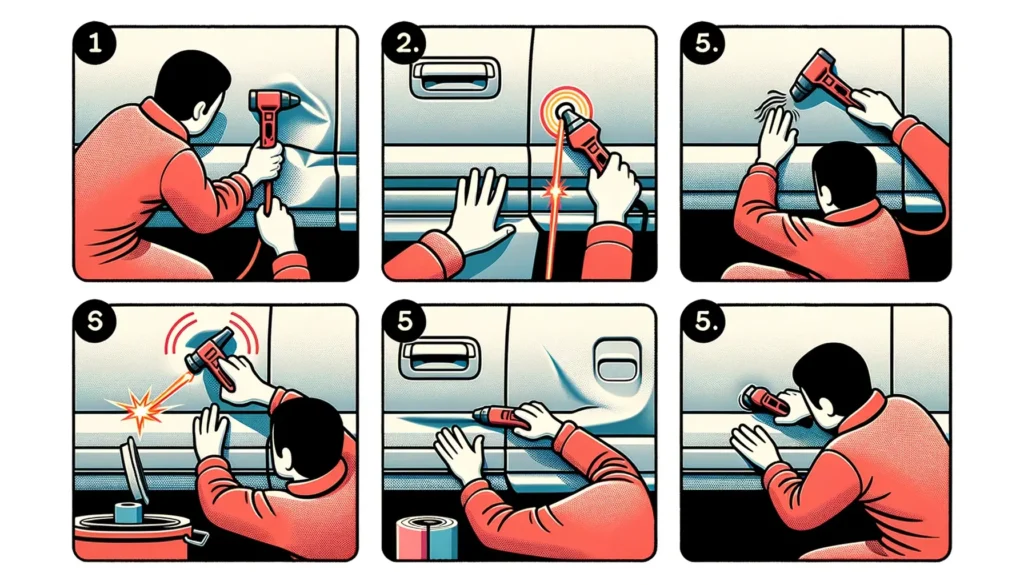
Assessing the Damage on Your Truck or SUV
When it comes to assessing the damage on your truck or SUV, it is important to carefully examine the affected areas. Begin by inspecting the exterior for any visible dents, scratches, or paint chips. Pay close attention to the body panels, such as the doors, hood, and fenders, as these are more prone to damage in accidents or parking mishaps. Take note of any areas that have been significantly dented or bent, as these may require more extensive repair work.
Next, check the windows and mirrors for any cracks or chips. These can be easily overlooked but should not be ignored, as they can affect visibility and compromise the structural integrity of the vehicle. Additionally, inspect the lights and indicators to ensure they are intact and functioning properly.
Once the exterior has been thoroughly examined, move to the interior of the vehicle. Check the seats for any rips or tears, as well as any damage to the dashboard, console, or door panels. Take note of any loose or broken components, such as knobs, switches, or handles.
By conducting a comprehensive assessment of the damage on your truck or SUV, you can gain a clearer understanding of the repairs that may be needed. This will help you prepare and gather the necessary tools to effectively address the dents and restore the vehicle to its original condition.
Exterior Inspection:
- Look for visible dents, scratches, or paint chips on the body panels.
- Pay attention to the doors, hood, and fenders.
- Note significant dents or bends that may require extensive repair work.
Windows and Mirrors:
- Check for cracks or chips.
- Don’t overlook these, as they can compromise visibility and structural integrity.
Lights and Indicators:
- Ensure they are intact and functioning properly.
Interior Inspection:
- Check the seats for rips or tears.
- Inspect the dashboard, console, and door panels for damage.
- Note any loose or broken components.
By following these steps and conducting a thorough assessment, you can better understand the necessary repairs and gather the tools needed to restore your vehicle.
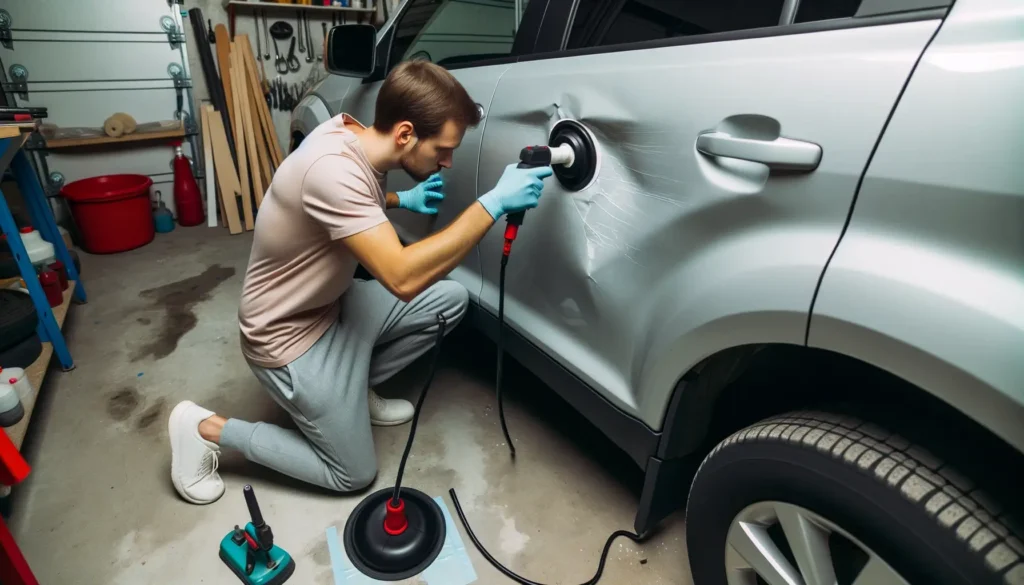
Gathering the Necessary Tools for Dent Repair
To successfully repair dents in your vehicle, it is essential to have the necessary tools at your disposal. These tools are specifically designed to make the dent repair process easier and more efficient.
One of the most basic tools you will need is a dent removal tool, also known as a dent puller. This tool allows you to easily remove dents by pulling them out from the surface of your vehicle.
Additionally, a rubber mallet or hammer can be useful for tapping out small dents that are not too deep. It is important to use a rubber mallet or hammer to avoid causing further damage to the surface of your vehicle.
In addition to these tools, it is important to have a dent repair kit, which typically includes a variety of dent removal tools such as different sizes of dent pullers and hammers. This kit also usually includes a slide hammer, which can be helpful for pulling out larger and more stubborn dents. Other tools that may be included in a dent repair kit are specially designed suction cups for pulling out dents, as well as a dent lifter tool, which is used to lift and straighten dented panels. Having a dent repair kit with all these tools will ensure that you are well equipped to tackle any type of dent repair job.

Preparing the Surface for Repair
Before applying any dent repair techniques, it is crucial to properly prepare the surface of the damaged area. The first step in preparing the surface is to thoroughly clean it to remove dirt, grime, or any other debris that may be present. This can be done using a mild detergent or a specially formulated surface cleaner. It is important to ensure that the surface is completely dry before moving on to the next step.
Once the surface is clean and dry, the next step is to lightly sand the area around the dent. This helps to create a smooth and even surface for the dent repair process. Using a fine-grit sandpaper, gently sand the damaged area in a circular motion. Be careful not to apply too much pressure, as this can cause further damage to the surface. After sanding, wipe away any residual dust or particles with a clean cloth. By properly preparing the surface, you can ensure a better and more effective dent repair process.
Applying the Dent Repair Techniques
Applying the Dent Repair Techniques requires a careful and systematic approach. Once you have assessed the damage and gathered the necessary tools, it is time to put your skills to the test.
Begin by focusing on the main dent, applying pressure gradually with your hand or a specialized dent removal tool. Gently massaging the area, work from the edges towards the center, using small and controlled movements. It is important to be patient and avoid rushing the process, as excessive force may further damage the surface. As you continue to apply the dent repair techniques, make sure to periodically step back and assess the progress.
Using Heat to Remove Dents
One method commonly used to remove dents is by applying heat to the affected area. This technique involves using a heat source, such as a heat gun, to warm up the metal surrounding the dent. By doing so, the metal becomes more flexible and allows for easier manipulation.
However, it is important to exercise caution when using heat to remove dents. Excessive heat can cause damage to the paintwork or even create further structural damage to the vehicle. It is crucial to apply the heat gradually and constantly monitor the temperature to prevent any mishaps. Additionally, this method is more suitable for smaller dents or areas with more pliable metal. For larger dents or creases, other dent repair techniques may be more effective. Nevertheless, using heat to remove dents can be an efficient and cost-effective solution when done correctly.
Employing Suction and Pulling Methods
Suction and pulling methods are two common techniques used to remove dents from vehicles. Suction involves using a vacuum-like tool to create suction and pull the dent outwards. This method is especially effective for smaller, shallower dents. By placing the suction cup over the dent and pulling firmly, the dent can often be popped back into place. It’s important to ensure that the surrounding area is clean and free of debris before attempting this method, as any dirt or grit could interfere with the suction.
Another method for dent removal is pulling. This involves using specialized tools such as dent pullers or slide hammers to exert force on the dent, gradually pulling it back into shape. This technique is particularly useful for larger, more stubborn dents. By attaching the dent puller or slide hammer to the dent and pulling with steady pressure, the metal can be coaxed back to its original form. It’s essential to follow the instructions carefully when using these tools, as excessive force or improper technique could cause further damage to the vehicle’s body.
Tapping and Knocking Out Dents
To effectively remove dents from the surface of your vehicle, tapping and knocking out the dents is a technique commonly used by professionals. This technique is particularly useful for larger dents that cannot be easily pulled or suctioned out.
Using a rubber mallet or a knockdown tool, gently tap the area around the dent to gradually knock it back into its original shape. Start from the outside edges and work your way towards the center of the dent. This method requires patience and precision, as excessive force can cause further damage to the surrounding paint or metal. Regularly check the progress of the dent and adjust your tapping technique accordingly. With proper execution, tapping and knocking out dents can provide satisfactory results, restoring your vehicle’s appearance without the need for costly repairs.
Filling and Sanding the Dented Area
Filling and sanding the dented area is an essential step in the dent repair process. After the dent has been assessed and the necessary tools have been gathered, it’s time to prepare the surface for repair. This involves using a body filler to fill in the dented area and creating a smooth, even surface.
To begin, the body filler is mixed according to the manufacturer’s instructions. It is important to blend the filler thoroughly to achieve a consistent texture. Once mixed, the filler is applied to the dented area using a putty knife or a plastic spreader. It is crucial to spread the filler evenly and smoothly, ensuring that it completely fills the dent.
After the filler has been applied, it needs to be sanded down to achieve a seamless finish. Starting with a coarse grit sandpaper, the excess filler is carefully sanded away, paying attention to maintaining a level surface. As the process continues, finer grit sandpaper should be used to achieve a smooth finish. It is crucial to keep sanding until the repaired area is flush with the surrounding surface, ensuring a seamless and professional-looking repair.
By following these steps, filling and sanding the dented area can result in a flawlessly restored surface. This important stage paves the way for the finishing touches: painting and polishing, which will be discussed in the subsequent sections of this article.
Finishing Touches: Painting and Polishing
Now that you have successfully removed the dent and restored the shape of your vehicle, it is time to focus on the finishing touches: painting and polishing. These final steps will not only improve the aesthetics of your vehicle but also protect the repaired area from further damage.
Firstly, you will need to choose the appropriate paint color that matches the original color of your vehicle. This may require consulting with a professional or using color matching tools to ensure an accurate match. Once you have the right paint, clean the repaired area thoroughly, removing any dust or debris. Use masking tape to cover the surrounding areas that you do not want to paint. Apply multiple thin coats of paint, allowing each coat to dry before applying the next. Once the final coat is dry, remove the masking tape carefully.
After the paint has dried completely, it is time to polish the repaired area. This step will give your vehicle a smooth and shiny finish, making the repair blend seamlessly with the rest of the surface. Start by gently buffing the area using a polishing compound and a soft, clean cloth. Use circular motions and apply light pressure. Gradually increase the pressure to achieve the desired shine. Once you are satisfied with the result, wipe away any excess compound and admire your hard work.
In conclusion, painting and polishing are essential steps in the dent repair process. Taking the time to properly match the paint color and give the repaired area a polished finish will not only improve the appearance of your vehicle but also ensure its longevity. With the right tools and techniques, you can achieve professional-looking results from the comfort of your own garage.
What is dent repair?
Dent repair refers to the process of fixing or removing dents from the body of a vehicle, such as a truck or SUV.
How do I assess the damage on my truck or SUV?
To assess the damage, carefully inspect the area with the dent, looking for any signs of paint scratches, creases, or cracks. Take note of the size and depth of the dent as well.
What tools do I need for dent repair?
Some necessary tools for dent repair include a dent repair kit, heat gun, suction cups, pulling tools, tapping block, body filler, sandpaper, and paint.
How do I prepare the surface for repair?
Start by cleaning the area around the dent using a mild soap and water. Ensure the surface is dry before proceeding. Sand the damaged area lightly to help the filler adhere better.
How do I apply dent repair techniques?
Dent repair techniques vary depending on the type and severity of the dent. Some common methods include using heat to remove dents, employing suction and pulling methods, and tapping or knocking out dents from the backside.
Can heat be used to remove dents?
Yes, heat can be used to remove dents. Apply heat to the dented area using a heat gun, and then use a gloved hand or a soft mallet to gently push the dent out from behind.
How can I employ suction and pulling methods for dent repair?
Suction cups and pulling tools can be used to pull out smaller dents. Place the suction cup over the dent and pull firmly, or use a pulling tool to gradually pull the dent back into shape.
Is tapping and knocking out dents effective for all types of dents?
Tapping and knocking out dents from the backside is more effective for smaller, shallower dents. This technique may not work well for larger or more complex dents.
When should I fill and sand the dented area?
After removing the dent, fill any remaining imperfections with body filler. Once the filler is dry, use sandpaper to smooth the area and create a level surface.
Why do I need to paint and polish the repaired area?
Painting and polishing the repaired area is necessary to match the surrounding paint and restore the vehicle’s appearance. It also helps to protect the repaired surface from rust or further damage.